 Parler
 Gab
Gab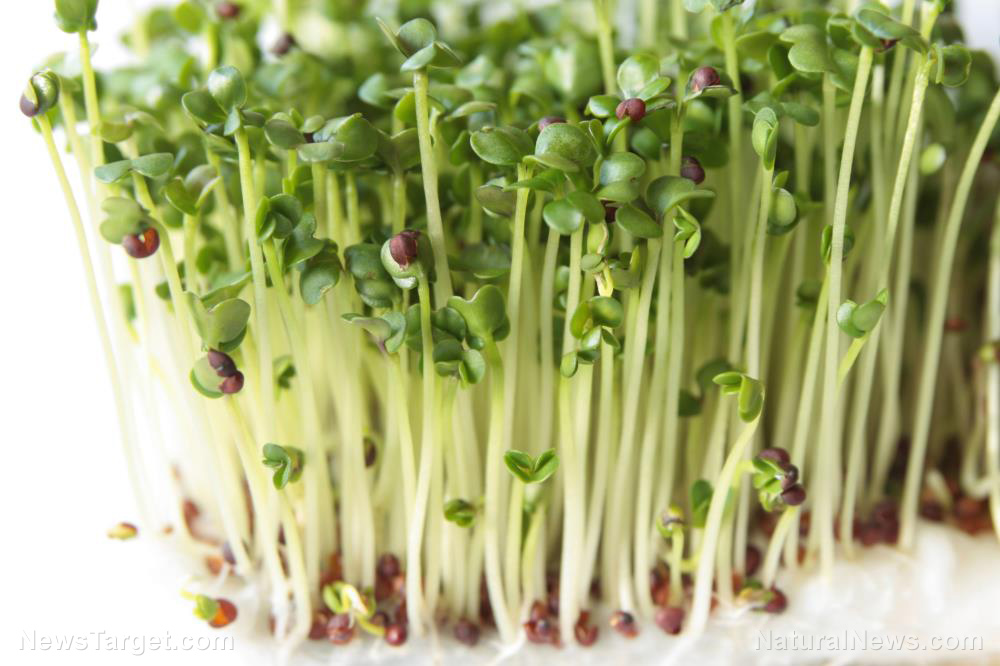
Tips for growing salad greens
Growing salad greens is easier compared to growing microgreens. If you have a home garden or an indoor garden, you may already have the equipment you need. The ideal location for indoor greens is a bright, south-facing window. If you live in a colder area, it might be better to use grow lights. Note that the winter sun's light is usually weaker than during summertime because of the Earth's rotation and tilt of its axis. When planting greens in winter, when the tilt puts your windows further from the sun, the light coming through them is weaker. The winter cold will also affect plants by a window so you can help your greens by using grow lights and a heat mat. If you're using grow lights, place them in an upstairs bedroom since heat rises. If you don’t have grow lights, you can use cheap fluorescent shop lights instead. Suspend fluorescent lights on chains and S-hooks from the ceiling of the designated spot. You don't need the very intense lighting systems that hydroponic growers use. Unlike hydroponically grown plants, vegetable and herb seedlings live indoors for only several weeks and regular fluorescent lights will meet their needs. After the seedlings are up and growing, you can gradually expose them to more sunlight in a window to prepare them for life in the garden. (Related: Sprouts vs. microgreens: Is one healthier than the other?) Make sure the light for your indoor greens is less than two inches from the tops of plants. Some seedlings grow faster than others so raise any of the slower growers by placing them on top of boxes so they can get closer to the light they need to grow. Get trays or pots with proper drainage, potting soil or other growing media. Fill the containers with a mixture of half soilless sterile potting soil suitable for seeds and half compost. If you want to save time, you can also use an all-purpose potting mix. Push the potting mix into corners to fill the containers. Well-filled trays mean more soil for the roots to explore, and this is key for stronger plants. Shake and tap the container to level and settle the potting mix after the trays are filled. Lastly, get the seeds for your preferred greens. Once the seeds are planted, water them and make sure they get 12 to 14 hours of light every day. Within 30 to 60 days, your salad greens should be ready for harvesting.Greens to grow at home
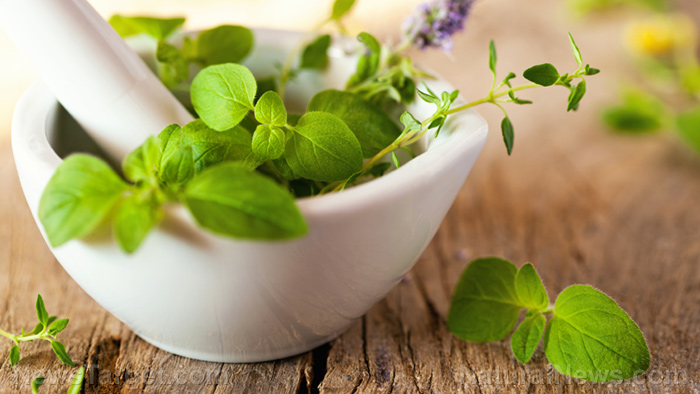
Not sure what greens to plant? Here are some nutritious vegetables to choose from: Asian greens, arugula and mustard Mizuna is an Asian green that's best for salads since it has a contrasting feathery texture, a mild peppery tang and various nutrients. Mizuna is great in stir-fries. Arugula is a delicious leafy green if you prefer something peppery. Mustard has a complementary warming flavor with colorful leaves for eye-catching salads. Iceberg lettuce Iceberg or crisphead lettuce forms a dense head of lettuce that looks like cabbage. Iceberg is the most popular variety of lettuce bought from the market and it has a refreshing crunchy texture with a sweet, mild flavor. Leaf lettuce Leaf lettuce comes in either green or red varieties that are often used for sandwiches, salads and wraps. Mache Mache, also called corn salad or lamb's lettuce, is another mild leaf that's very prolific. Once you grow mache, you can enjoy lots of leaves for winter salads. Mesclun If you want seeds for winter planting, try a fast-growing mesclun or braising mixes (stir-fry mixes). Scatter the seeds thickly across the soil surface, cover them with a bit of compost and water them well. Pea shoots Hardy varieties of pea shoots produce leaves with a sweet and fresh pea taste. Pea shoots are best for salads, but you can also use them as a garnish on soups. Once the shoots are eight to 10 inches tall, harvest the top few inches so you can keep harvesting. Romaine lettuce Romaine lettuce is known for its long, broad leaves around compact hearts. This lettuce is sweet with a crisp texture. The outer leaves of romaine lettuce are often used as wraps instead of bread. Winter lettuce Oak-leaf lettuce and various leaf lettuces are a great base for salads. Winter lettuce is also a great choice if you want to continue harvesting as you remove a few leaves every week and extend production over a longer period. Winter purslane Winter purslane or miner's lettuce of Claytonia is a very hardy winter green with lush, almost juicy leaves with a smooth, mild taste.Why grow microgreens?
Don't let their size fool you. Microgreens are very tiny but they are packed with nutrients. If you know how to grow them, you'll have fresh greens for soups and salads year-round. A microgreen is the cotyledon and first true leaves of a plant. They're usually cut at 1" to 1 1/2" high and you won't be able to save the seed from them. Microgreens are different from sprouts, which are germinated seeds that are produced almost entirely in water. You can add sprouts to your diet and like microgreens, are a great way to use up old seeds. Microgreens are full of beneficial antioxidants. They also contain nutrients like carbohydrates, fiber, protein and various vitamins and minerals like magnesium, phosphorus, potassium, zinc and vitamins B and C.Equipment for growing microgreens
You need soil or peat moss, coco coir or seed mats to grow microgreens. You don't need a deep space like a nursery pot because microgreens won't develop deep roots. Instead, get a shallow tray that drains well. To save money, wash food containers instead of buying trays for your microgreens. If using a food container, carefully add drainage holes. Drainage helps prevent mold from developing. First, prepare the nursery flats or trays, soak the seeds and seed them. Water the seeds, give them plenty of light and keep them warm. Seed them heavily so you have more greens. Crowding won't be an issue since you will harvest the greens long before then. Covering the seeds with plastic or a humidity tent can speed up germination. Uncover the seeds the moment they break the soil. You don't have to grow microgreens to maturity and the greens can be ready to eat within 14 days. If you consume a lot of microgreens, try succession planting by planting one flat every week so you can harvest fresh greens one week at a time.Seeds you can try growing
A variety of seeds can be used to grow microgreens, such as:- Amaranth
- Arugula
- Basil
- Beet
- Broccoli
- Buckwheat
- Cabbage
- Chia
- Cilantro
- Fenugreek
- Kale
- Mustard
- Peas
- Radish
- Swiss chard/chard
Considerations before growing greens and microgreens
When growing microgreens follow the steps properly to avoid contamination risks, such as E. coli. Some seed varieties are more susceptible than others and the risk increases the longer you store uneaten greens. There are several ways to prevent contamination when growing microgreens. You can use commercial chlorinated packets or rinse the plants frequently as they grow. Another option is to spray chlorinated water from the tap before eating. Note that the shelf life of microgreens is 10 to 14 days after harvest. If several days have passed and your microgreens are starting to look rather unusual, don’t eat them so you don't get sick. Once you start producing greens or microgreens, use them to make tasty salads, soups or sandwiches. Visit HomeGardeningNews.com for more tips on how to grow vegetables indoors. Watch the video below for tips on how to grow pea shoots indoors. This video is from The Sage Patch channel on Brighteon.com.More related stories:
Prepping 101: How to grow food in an indoor survival garden. Sprouts vs. microgreens: Is one healthier than the other? Food storage tips: 11 Superfoods that boost your nutrient intake. Sources include: TheOrganicPrepper.com Almanac.com Brighteon.com
Prepper must-haves: 15 Tools and supplies you need on your homestead
By Zoey Sky // Share

Top 10 ways to WARD OFF Fauci Flu that you may not know about
By S.D. Wells // Share

Superfood recipes: Boost your fiber intake with this apple pie smoothie
By Zoey Sky // Share
6 Primary types of tea and their science-backed health benefits
By Olivia Cook // Share

12 Tips to survive an EMP attack
By Olivia Cook // Share

No Deal on Iran: Why the West's Unreasonable Demands Will Lead to Global Catastrophe
By healthranger // Share

These 4 antioxidants could be the missing link for tired, dull skin
By isabelle // Share

Humanoid robots enter American homes as Gatsby launches autonomous cleaning service
By isabelle // Share


Modest curcumin dose shows blood sugar improvement in older prediabetic adults
By isabelle // Share